Before uploading artwork, you must first create an account and log in. You will then be able to upload your artwork before paying for your order.
We accept files in the following formats: pdf, ai, psd, eps, tiff, png, jpg, and indd. It is best to send your files in the native format created by the software and saved as a pdf. Please upload all images and fonts used in your artwork if they are not embedded in your art file.
Download 12oz can PDF artwork template
Download 16oz can PDF artwork template
Download 32oz can PDF artwork template
SHRINK SLEEVE ARTWORK GUIDELINES
Slit Width — It is the total width of a shrink sleeve before it is seamed.
Cut Height — It is the total length of the sleeve.
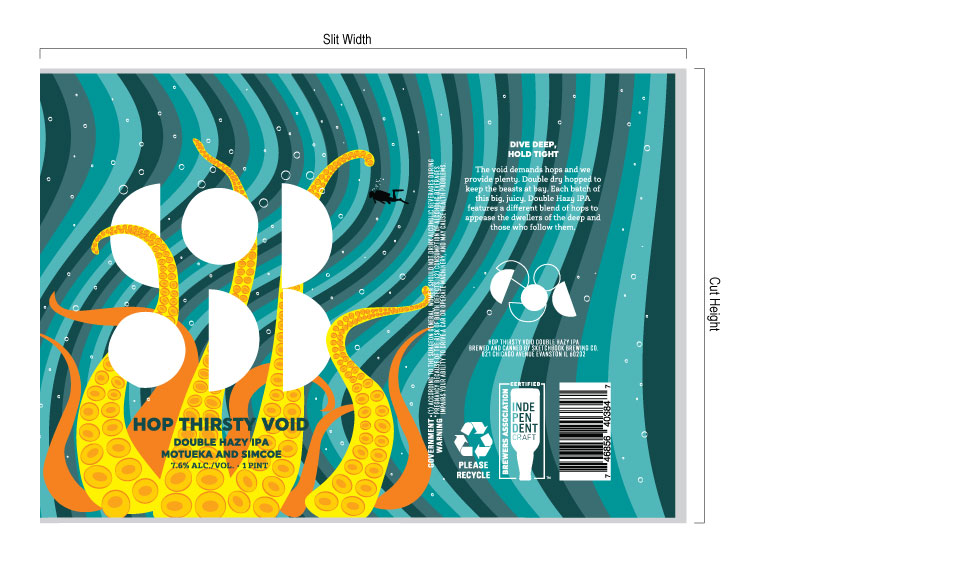
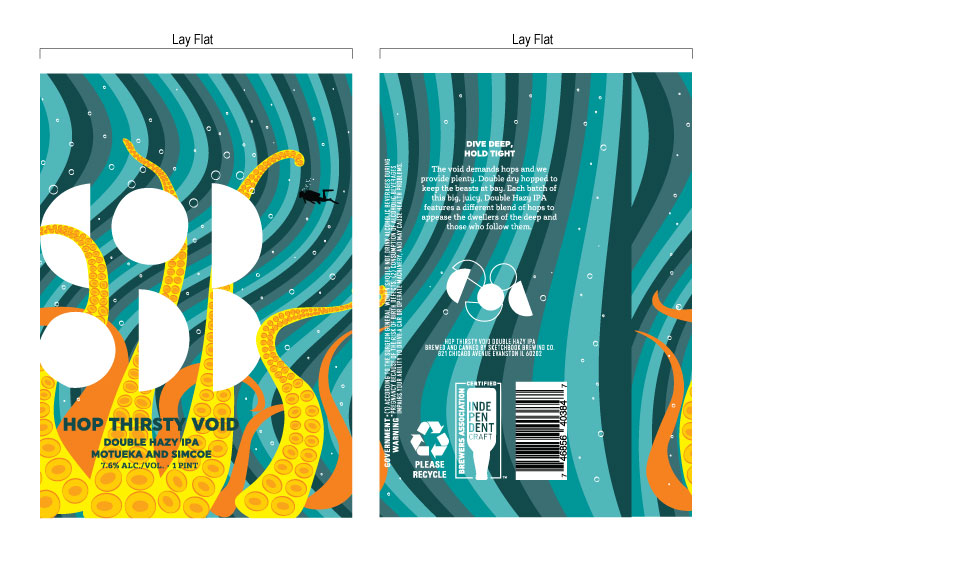
Lay Flat — It is the width of the seamed shrink sleeve or the width of the finished product, which is less than a half of slit width
Generally, the print height is 4 mm less than the cut height, leaving 2 mm on the top and the bottoms of the shrink sleeves without printing. Similar, the print width is 4 mm less than the slit width to accommodate for seam.
***1 inch = 25.4 mm***
The formula to calculate the slit width, if unknown, is to measure the container’s circumference in millimeters, and add 13 mm. The formula to calculate the lay flat, if unknown, is to take the slit width and subtract 8 mm, then divide by 2.
Slit Width = Container Circumference (mm) + 13 mm
Lay Flat = Slit Width – 8 mm / 2

Detailed specifications & sizes should be included in the job. Artworks must fit the template provided by us, showing fold lines, seam area and layout restrictions. As to ensure a high quality printing, all picture resolutions should be at least CMYK module 300 dpi at 1:1 size. Colors and their Pantone® numbers should be clearly labeled if it is necessary. Spot colors are best for matching specific colors. Printing colors will be matched accordingly to CMYK and spot color to Pantone® standards.
Critical Art Box — This is the area in which the sleeve will be flat against the container. The areas above and below this box will be on the bend of the container. The artwork can become distorted outside the critical art box, but it is at the customer’s discretion on whether or not to put art in those areas. The area to the left of the box can be lost during the seaming process.
Fold Lines — This is to indicate where the sleeve will be folded during seaming. It will be the front of the sleeve and some customers have very crucial fold line placement due to their container. Normally there is a fold 25 mm from the left-hand side of the sleeve, but can be adjusted if needed.
Slip Coat — The purpose of a slip coat is to:
- Help the sleeve slide onto the container without resistance
- Scratch resistance for the machinery auto-applying the sleeve. 99.9% of the time auto applied roll sleeves require a slip coat. We offer white slip coat, clear slip coat, or a UV non-slip slip coat.
We finish sleeves on rolls or sheeted as flats. Roll sleeves can be finished on 5”,6” or 10” cores. When sheeted in flats, we typically will chipboard and rubber band in stacks of 100 unless otherwise requested.
Barcodes — Presto strongly suggests barcodes be printed vertically on the sleeve, not horizontally.Depending on the shrinkage of the sleeve, the barcode’s bars can close when printed horizontally, causing the barcode to not scan correctly.